
There is a growing interest in the traditional quilt-making method known as English paper piecing.
It was fairly recently when I first discovered this patchwork artform. At first, I wasn't real excited about all the handwork and wasn't sure it was going to be something I would enjoy.
But after basting and stitching together my first hexagons, I was hooked. Now, it's my preferred method of patchwork! Shocking as it may sound.
I'm not the only one that is taking up English paper piecing (called EPP for short). Many quilters are being drawn to try out this patchwork method and you might be one of them. So I thought I would put together a mini-series to help you in getting started with EPP.
Intro to the EPP blog series
In this short getting started series, I'll be sharing the basics of English paper piecing, showing you step-by-step how to start a super cute and practical EPP project and what to do with your patchwork once it's all stitched together.
We'll be making an EPP bookmark together. So you'll have something to show for it at the end of the series.

What?! A mystery?
Well, not entirely. The project you're going to make will be a bookmark but the exact design will be up to you!
I will give you some options and ideas to work with, but I really want you to make this bookmark your own.
I'll also include video tutorials along the way if you happen to be a visual learner. The links to the video will be right inside the blog post. So they'll be easy for you to find.
Scroll down to see this week's video in which I discuss in detail which tools and supplies you'll need and where to find them if you don't have them.
I'll be publishing a new post in the series each week over the course of four weeks. The topics we'll be covering are...
- Week 1: Tools and Supplies for EPP (this week)
- Week 2: Cutting Fabric & Basting Pieces
- Week 3: Stitching: How to Sew EPP Hexagons Together
- Week 4: Finishing: How to Finish Your EPP Project
Since this is the first post in the series, I'll return here to add the links to the future posts in this getting started series as they're published, so be sure to bookmark this page.
If you'd like to receive email updates when each post is published, subscribe to my newsletter at the bottom of this post.
Brief Introduction to EPP
Before we get into the tools and supplies you'll need to get started with English paper piecing, I want to first give you a brief introduction and answer a common question...
What is EPP?
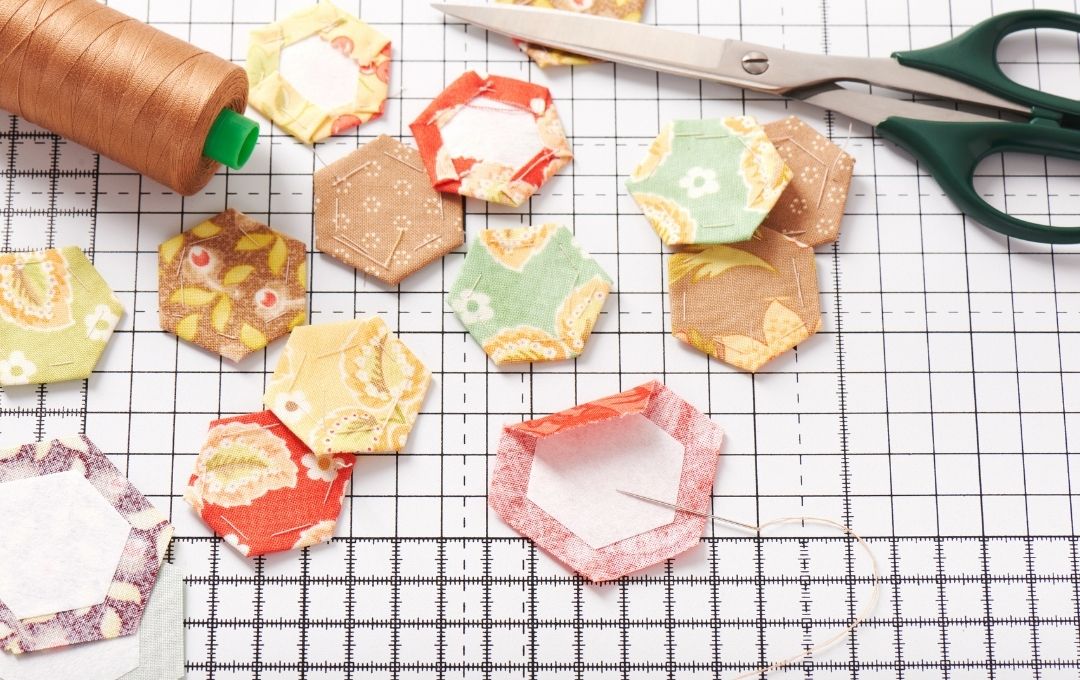
As you may have already guessed, EPP in quilting language stands for English paper piecing. It is a traditional quilt-making technique used to create patchwork with hand piecing.
Fabric is wrapped around a paper template and then hand-stitched together, allowing you to make complex shapes and intricate designs that would otherwise be next to impossible with a sewing machine.
Once the pieces are stitched together, the paper templates are removed. Because it's portable, it's a great technique that allows you to take your hobby with you wherever you go.
How do I start an EPP?
So maybe you're wondering, "How do I start an English paper piecing project?" I'm hoping to answer that question over the course of this blog series. So stay tuned.
Before you can get started stitching, you first need to gather the tools and supplies needed. I'll talk about those in just a second.
First, I want to give you a quick overview of the EPP process...

How to do English paper piecing - An Overview
As with any quilt-making method, there are specific steps to get from point A to point Z. Let's go over the one for English paper piecing, here.
1. Gather your tools and supplies.
We'll be discussing EPP tools and supplies below. For now, just know that there are some basic tools you'll need to start an EPP project.
In fact, there are really only six items you need to get started. Check out my list down below.
2. Cut your fabric.
After you've gathered your supplies, the first step is cutting your fabric. Because English paper piecing is a template-based technique, you'll be cutting your fabric to fit around your templates.
Yes, you're going to need templates. Keep reading for two ways to get them. One is free. One is paid.
We'll be covering exactly how to cut your fabric in next week's blog post.
3. Baste your fabric to your templates.
We'll be covering how to baste your fabric to your EPP templates in next week's post also.
For now, all you need to know is that your fabric pieces are going to be wrapped and attached to your template pieces. This is what ensures accurate shapes for stitching.
Next week, I'll show you my favorite technique for basting and give you some tips so that your shapes will be accurate for stitching.
4. Stitch fabric shapes together.
This is the fun part! Now we get to stitch our shapes together. There are a few different techniques out there for doing so.
I'll be sharing my favorite stitching method in week three.
5. Finish your EPP project.
Once your shapes are sewn together, it's time to decide how you want to finish them. This will be based on how you want to use your EPP design.
Do you want to add it to a bag? Will you be making a quilt? Different projects will require different finishing methods.
The most common finishing method for English paper piecing is to applique the design onto a background fabric. This method can be used for all sorts of different projects.
In the last post of this series, you'll finish your bookmark project by appliqueing your EPP design to background fabric so that you become familiar with this technique.
Be sure to bookmark this page and subscribe to my newsletter for updates when each post in this Getting Started with EPP series is published.
Getting Started - Tools & Supplies for EPP
Now that you have an overview of the EPP quilt-making process, let's talk tools and supplies.
As with any quilting technique, there are all sorts of fun tools out there that can help your EPP process go more smoothly.
But I don't want to overwhelm you with too much, especially if you're just beginning your English paper piecing adventures.
So rather than provide you with a long list of tools and supplies you may never ever need, I've decided to keep the following list of tools short and sweet - focusing only on the essential tools and supplies you'll need for getting started with English paper piecing.
If you prefer to watch the video where I show you exactly what you need to get started with EPP, here it is...
6 Essential Tools to Start EPP
You really only need six tools to get started with English paper piecing. Most of which you most likely already have. Let's discuss each one briefly.
1. Fabric
You're obviously going to need fabric. You can use scraps or yardage. You could also upcycle fabric, as well.
I recommend sticking with quilting cotton if you're a beginner. It will lessen your learning curve by working with a stable and easy fabric to work with.
The nice thing about EPP is that it's very conducive to scrap-busting. It's a great way to use up your fabric scraps.
For the project we'll begin making next week, you won't need much fabric at all. Two or three small scraps of about 10 inches square or about half a fat quarter for each color.

These are the fabrics I've chosen for my bookmark. Can you see how they all relate to one another? The blue fabric has red, white, and green. So the green and red fabrics go well with the blue because they have colors in common.
Go ahead and start gathering some fabrics that you think coordinate well with each other. We'll begin using them next week.
2. Templates
The next supply you'll need for English paper piecing is templates. Now, templates can be made out of any paper you happen to have around.
Traditionally, EPP templates were hand-cut out of old magazines, wallpaper, junk mail cards, old greeting cards, even newspapers!
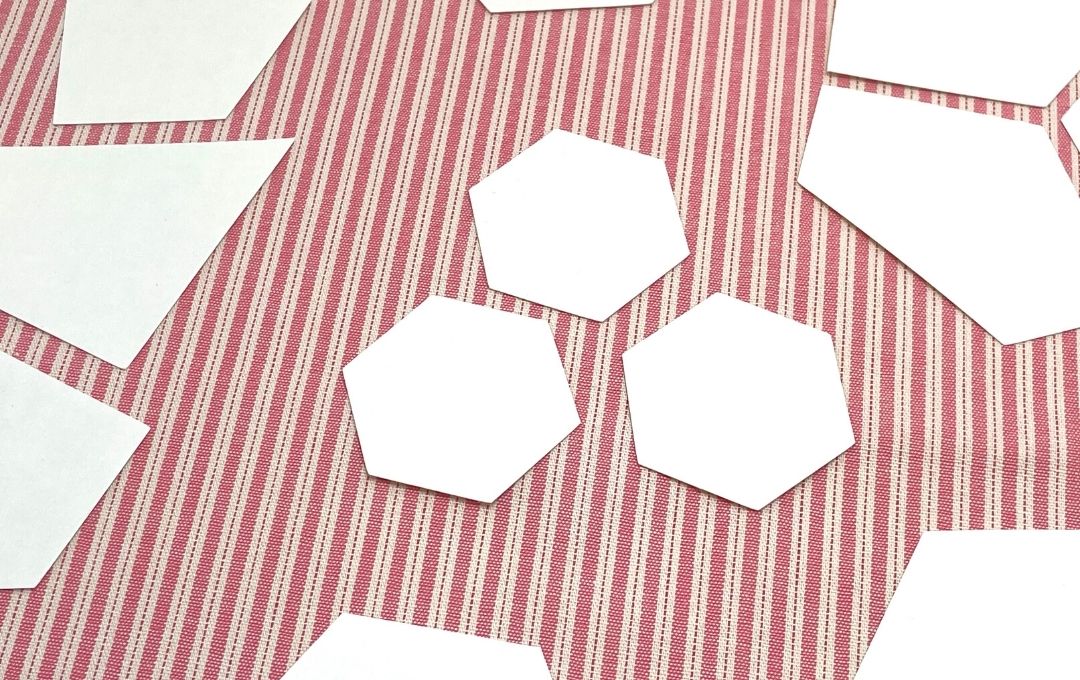
These days, the most common type of paper used for EPP templates is cardstock. But you can also use just plain old printer paper.
There are a couple of ways to get templates. One way is to make your own. This not only saves you money but also allows you to create any shape and size you might need.
The second way to get EPP templates is to purchase precut paper templates.
For our project, you're going to need 3/4-inch hexagons. You can download free printable English paper piecing hexagons if you want to make your own.
Print them onto plain paper or cardstock. Then cut them out with scissors. Easy peasy.
This leads me to the next English paper piecing tool on our list of essentials...
3. Scissors
Next on our list is... you guessed it. Scissors! Now, I just mentioned above that a rotary cutter can also be used to cut your paper EPP shapes. But for those of you who don't own a rotary cutter, regular office scissors will work just fine.
You'll be cutting both paper and your fabric. So make sure the scissors you use are sharp so that they can cut the fabric okay. The last thing you want is to try to cut fabric with dull scissors. It doesn't work out very well.

If you happen to have a second pair of scissors that are already designated as fabric-cutting scissors, then by all means please use those to cut your fabric.
4. Glue Stick
This is a relatively new addition to the English paper piecing tool kit. I love how it speeds up the EPP process just enough so that you still get the slow stitching benefits without being slower than molasses.
Using a glue stick to baste your EPP shapes helps ensure better accuracy of the shape when sewing and because it speeds up the basting process considerably, it makes you more efficient, too!
There are several types and brands of glue stick out there. What you want is a glue stick that is solid. Not liquid. The thickness doesn't really matter.
I recommend starting out with a school glue stick by Elmer's. It's inexpensive and lasts a long time. There are other brands that are made for sewing that cost quite a bit more and don't last very long at all.
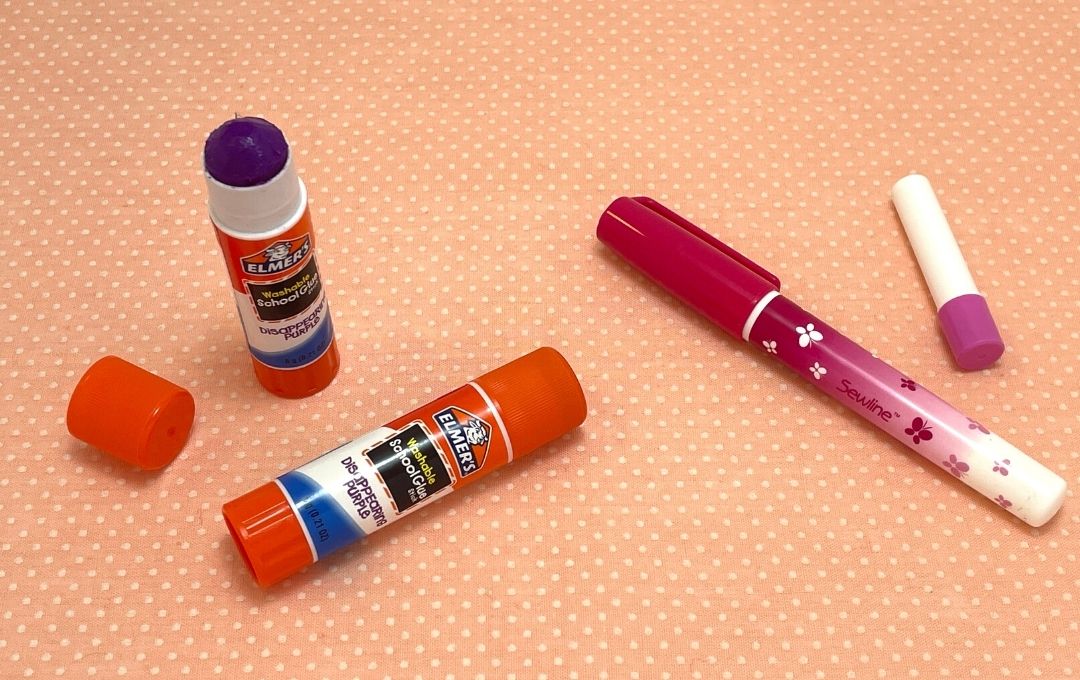
So if you're just getting started with EPP, stick with the inexpensive glue stick, for now. Once you know you like English paper piecing, then you can expand your tools and supplies to find what you like best.
You'll be using your glue stick for the basting step, which I'll be covering in next week's video. So stay tuned for that.
5. Needles
Sewing needles are the next item you'll need to get started with EPP. If you don't already have some, I recommend you look for needles that are called sharps.
This type of needle has a good length which makes it easy to handle while sewing, a good size eye making it easy to thread the needle, and is sharp, perfect for English paper piecing.
If you already have a stash of sewing needles, you'll want to look through them and pick one out that matches the description I gave above. A good length needle for English paper piecing is about 1-1/4 inches.
Any shorter and you'll have a hard time holding it in your hand. But if it's too long it could become unwieldy. Find something around an inch and a quarter and you should be good.

Whatever you do, don't use an embroidery needle. Those babies are much too thick for our purposes here. Try to find a hand-sewing needle about the same thickness as a sewing pin, or less.
6. Thread
There are endless varieties of sewing thread available on the market today. And many of them can be used for English paper piecing.
For our purpose, since you're just getting started, stick with a standard polyester thread. This will ensure that it's a strong enough thread.
You want a strong thread, especially when you're just beginning English paper piecing so that you can get used to how tight you want your stitching tension, or how tight you need to pull your thread.

If your thread is not strong enough, it could break on you causing unnecessary frustration along the way. I don't want you to experience that. So get some polyester thread if you don't already have some, from your local craft store or the craft section at Walmart.
It's inexpensive and will work great for EPP.
Let's Get Started with EPP!
Now that you know what tools you'll need to get started with EPP, now it's time to gather them together and get ready to sew your hexagon bookmark project. How exciting!
Gather your tools
Get all six of the tools and supplies and put them in a safe place so you'll be ready to begin English paper piecing when I release the second part in our EPP series next week.
If you need to purchase any of them, go ahead and do that now. That way you'll have them in hand and ready to go next week.
Bookmark this page
Lastly, be sure to bookmark this page so you can easily reference it if you need to. I've put the outline of the Getting Started with EPP Series at the top of this post so you can see what we'll be covering each week.
I'm looking forward to walking through the English paper piecing process step by step. I can't wait to see the lovely bookmarks you're going to make!
See you back here next week for the next installment of Getting Started with English Paper Piecing, where we'll begin the process and actually start an English paper piecing project.
Want More Inspiration?
Subscribe to our newsletter to get free patterns, tutorials,
updates, and inspiration delivered right to your inbox.


