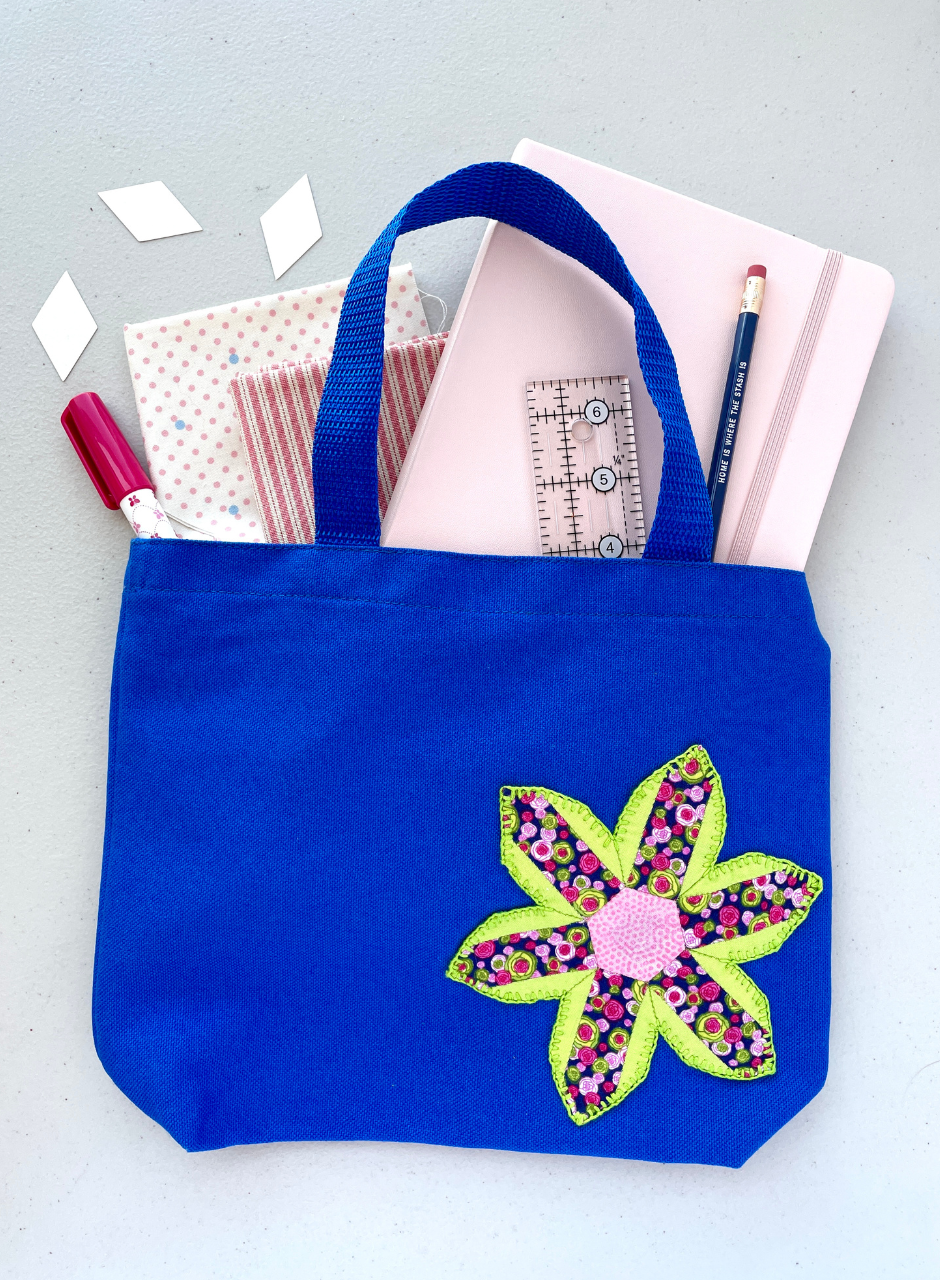
This beginner-friendly English paper piecing tote bag tutorial features an English paper pieced motif from the Flowers & Butterflies EPP pattern.
If you've never made an EPP project before, consider this the perfect starting place to try it out. This project has all the fun of English paper piecing without the quilt-sized commitment.
(Spoiler alert: you'll probably fall absolutely in love with EPP, sew up an entire Flowers & Butterflies quilt, and live happily ever after.)
You May Also Like...
- Best Needles for English Paper Piecing
- Getting Started with English Paper Piecing: Essential Tools & Supplies
- 5 Easy Ways to Make EPP Templates
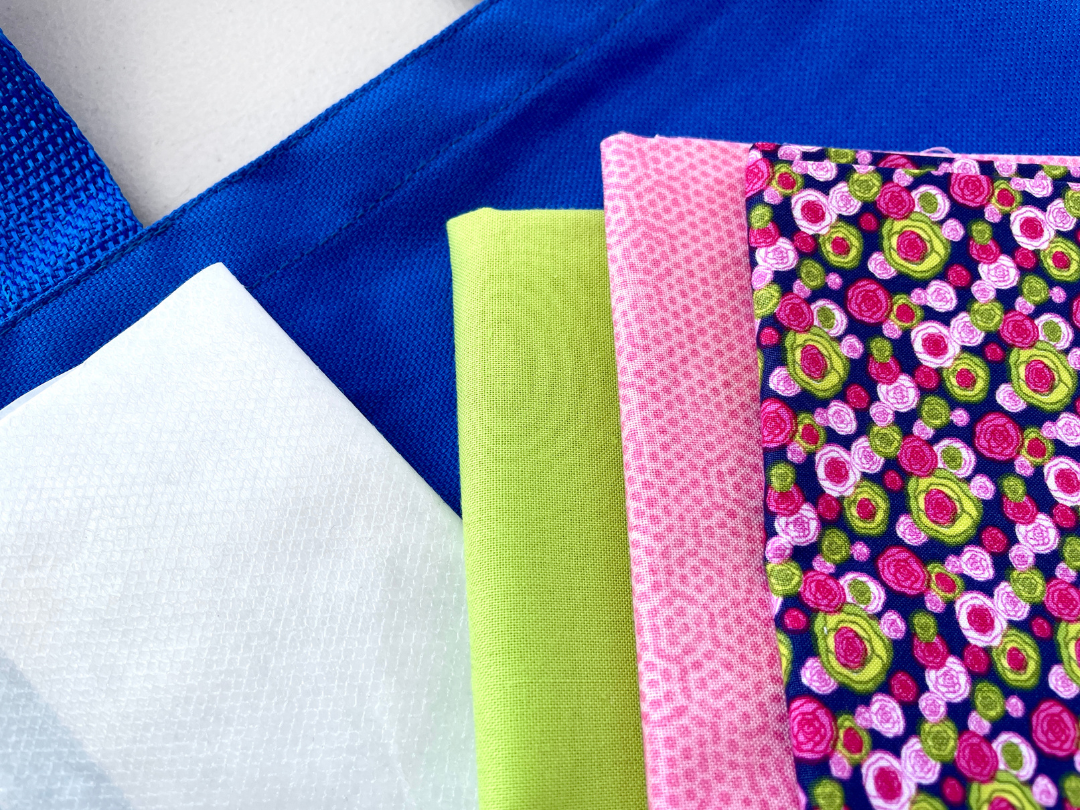
EPP Tote Bag Tutorial: Fabric
- Main bag: I found small canvas tote bags for less than two bucks each at my local big box craft store.
- Fabric for motifs: Once you see the templates that are included in the pattern, you'll see that you don't need very much fabric for these, especially if you want to mix a variety of fabrics together. A 1/4 yard or a FQ of fabric of each color would be more than enough. You can even get away with using scraps for these.
- Iron-on adhesive: A small piece of adhesive is all that's needed for this. I used a scrap piece that was about 10 inches square to cut my shape out from.
Basic Sewing Supplies
- Flowers & Butterflies #2 pattern: This is where you'll find the templates and instructions for assembling the flower and butterfly motifs.
- Hand sewing needle
- Embroidery thread
- Thimble
- Template paper
- Quilting ruler, a small one will work best
- Scissors
- Iron & ironing board
Optional Supplies (that'll make things easier)
- Disappearing ink pen
- Needle minder
- Wonder clips
- Best Press starch
- Tool for removing templates

Quilting Terms
- FQ = fat quarter, a pre-cut piece of fabric measuring approximately 18 x 21 inches
- SA = seam allowance, 1/4" to 3/8" for English paper piecing
- RS = right side of the fabric
- WS = wrong side of the fabric
Step 1: Create the Motif
Using your Flowers & Butterflies pattern, create as many flowers or butterflies you want to put on your tote bag. If this is your first time sewing these motifs (or even if it isn't), here's a lovely video tutorial that explains step-by-step the flower construction and another one that explains the butterfly construction.
Once you've finished the English paper piecing pattern motif, you're ready to move on to Step 2 of this EPP tote bag tutorial!

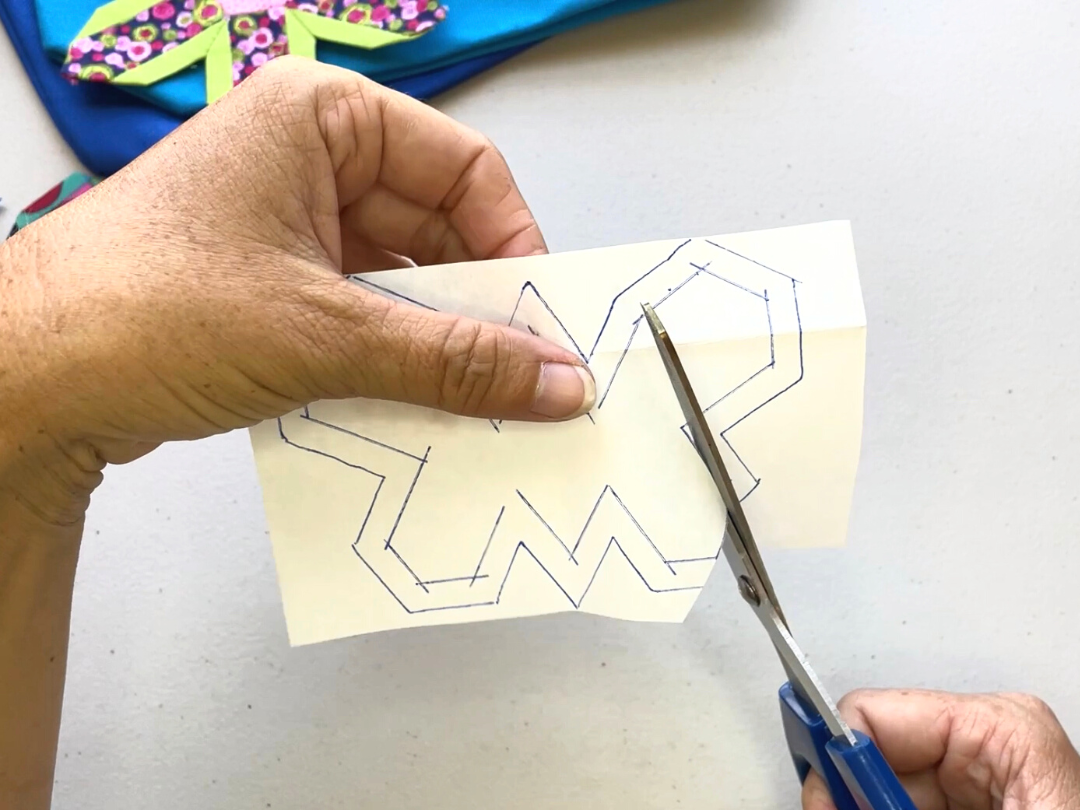
Step 2: Prep the Adhesive
First, you'll want to outline your motif on the paper side of the adhesive. After you've traced around your flower or butterfly, draw another line 1/4" inside of the first outline you drew using your small quilting ruler. This will be your cut line.
Cut out your adhesive along the inner line that you've drawn.
Step 3: Remove the Templates
Before you can attach the adhesive to the motif, you'll want to remove the paper templates from the back of the motif. You can do this one of two ways. I like to use a tool that has a beveled edge to help lift the seam allowances off of the paper. Or you can simply pull up the seam allowances by hand, being careful not to fray the edge of your fabric.
Once your templates have been removed, give the motif a good press to get your seam allowances back where they belong. I find that a combination of finger pressing and iron pressing helps wrangle any seam allowances that don't want to cooperate.

Step 4: Attach the Adhesive
With the motif still face down on your ironing surface, place the adhesive, glue side down, on top of the motif and press using your iron. The length of time you need to press will depend on the brand of adhesive you're using. Be sure to read the package instructions for the recommended pressing time.
Check to make sure the adhesive has adhered well to the back of your motif. Since the adhesive layer is a bit smaller than the motif, it will allow you to tuck any stray SA under when you are stitching the edges to the bag.

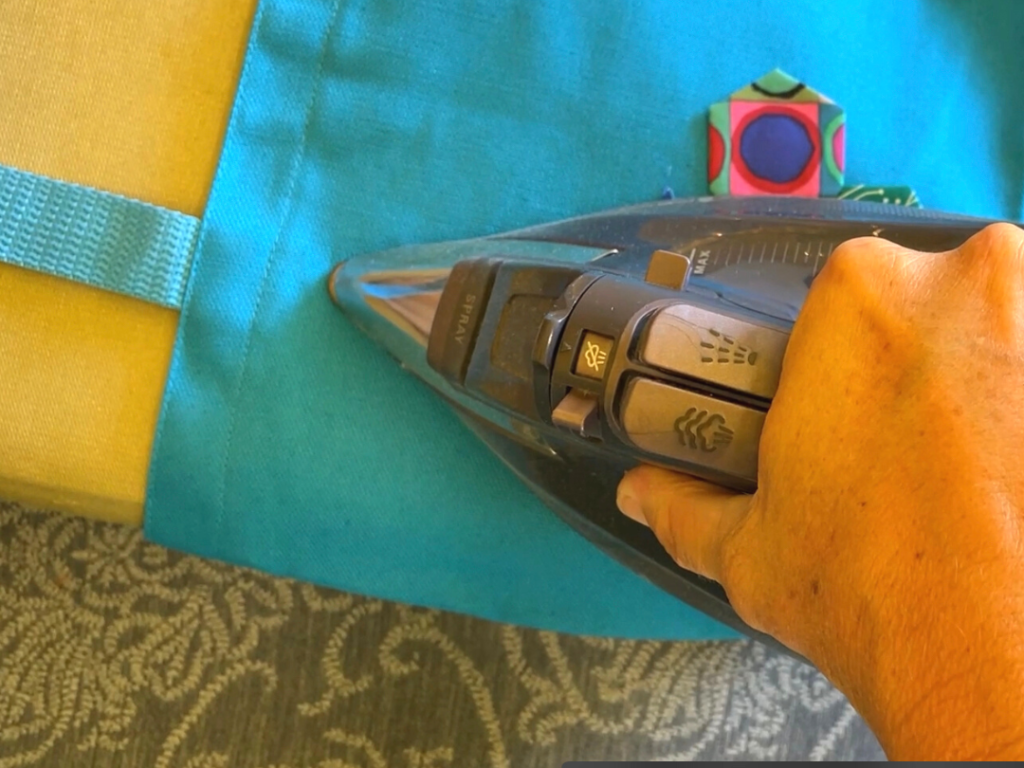
Step 5: Apply Motif to the Bag
Peel off the paper backing from the adhesive and place the motif face up onto your tote bag. Don't worry if you have some SA sticking out. You'll be able to tuck it in later. Once you have the motif placed where you want it on the bag, press the motif with your iron for the recommended amount of time suggested on the package. Allow the bag to cool before moving it.
Step 6: Applique the Edges
Now for the fun part! Stitching! If you've never tried hand-applique, this EPP tote bag tutorial may be the perfect size project for you to try out and see if you like it.
You could also machine applique this project if you don't want to hand applique. Make sure you select the right machine needle for the fabric you're using. If I had machine-appliqued mine, I would've chosen a denim needle since I used a thick canvas tote bag for this project.

Get creative with this part! There are a number of embroidery stitches you can use to hand applique your motif to the bag. I chose to use a simple whip stitch for my butterfly tote bag and a blanket stitch for my flower tote bag. Have fun experimenting with different thread colors and weights for different effects.
If you've never done hand embroidery before, there is a great book that will teach you how with step-by-step photos. Every embroidery stitch you could ever want is inside! It happens to be the same book I'm using to learn how to hand embroider.

Step 7: Final Press
Give your tote bag a final press with your iron to flatten out any creases or wrinkles that appeared from handling the bag while stitching. Your EPP tote bag is now ready for use!


If you made it all the way through this English paper piecing tote bag tutorial, you're probably ready for a second round with Flowers & Butterflies #2. We can never have too many flowers or butterflies, can we? So, stitch 'em up!
In a future post, I'm going to show you another super fun and easy project to make using several English paper pieced flowers and butterflies. If you want to know when I post that project, subscribe to my newsletter to get notified.
If you have any applique tips for English paper piecing, or if you're just really excited to make this English paper pieced tote bag, let us know in the private Facebook Group!


In a future post, I'm going to show you another super fun and easy project to make using several English paper pieced flowers and butterflies. If you want to know when I post that project, subscribe to my newsletter to get notified.
Want More Inspiration?
Subscribe to our newsletter to get free patterns, tutorials,
updates, and inspiration delivered right to your inbox.